Avocados are on trend and super delicious. You can use them in many dishes and on snacks but buying avocados can be expensive. That’s why we are here to help you grow your very own avocado tree so you can save money and still enjoy the wonderful fruit that you love.
Preparing the seed:
The first step is to buy an avocado for the seed. We suggest buying a few avocados and trying to make a few of the seeds into trees, some seeds will sprout easier and faster than others.
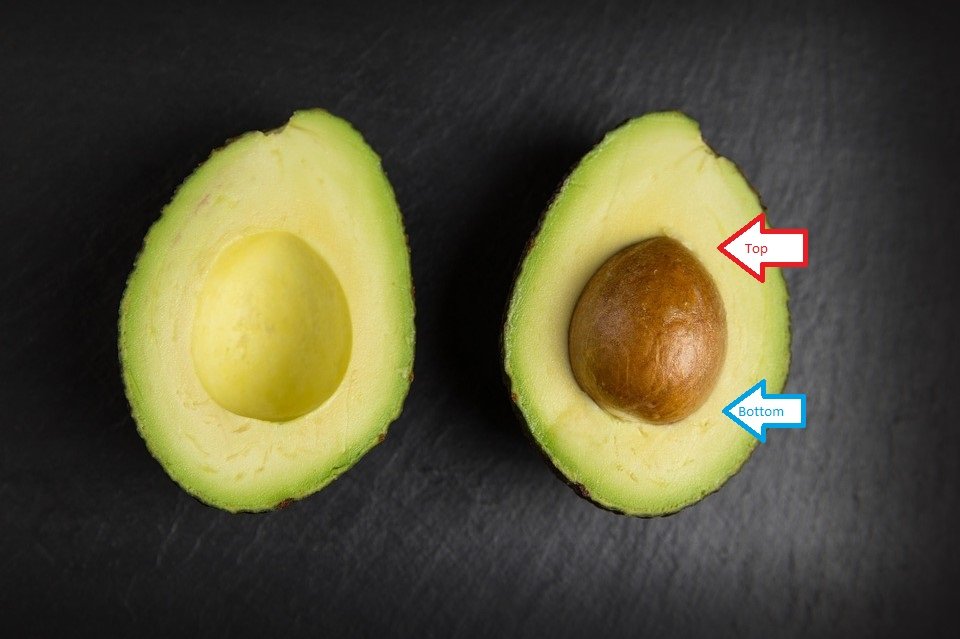
The second step is removing the seed from the avocado without cutting the seed or the seed cover, however, before you do this you need to discover which side of the seed is the top and which is the bottom. This is due to the fact that the top of the seed will produce a sprout and need to be out of the water facing towards the ceiling and the bottom of the seed will produce a root and need to be in the water, facing the ground. This is easy to find when the seed is in the avocado because the top of the avocado seed is the facing the top of the avocado and the bottom of the seed is at the bottom of the avocado.

Once you have discovered the top and bottom of the seed, remove the seed and then rinse the seed under water to get the seed clean of avocado.
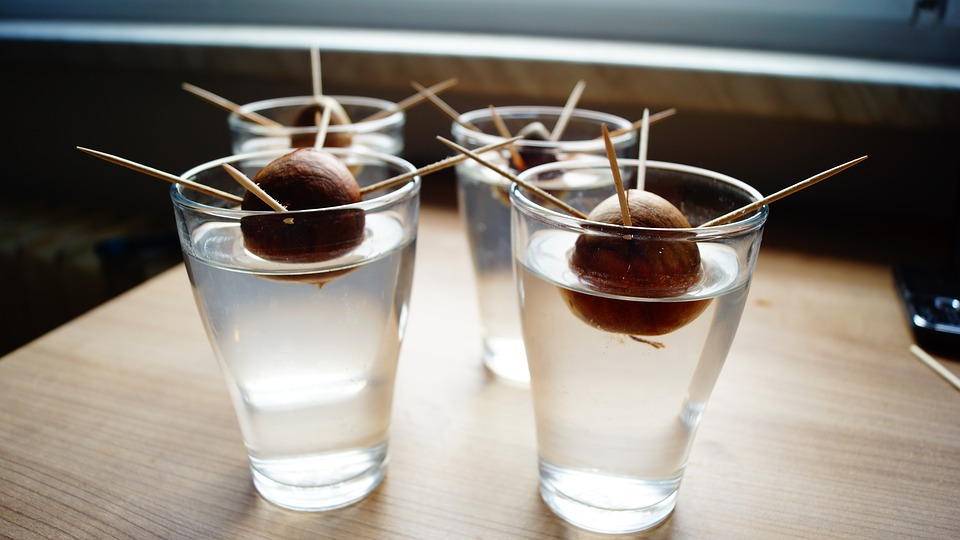
After this, get three to four toothpicks and stick them into the seed, at an angle around the sides of the avocado seed. Make sure the top of the seed is facing the ceiling still. Once all the toothpicks are in the seed, full up a cup of water and place half the seed into the water by resting the toothpicks on the rim of the cup, so the avocado is half in the water and half out.

The waiting stage:
Now that your seed is sitting in water, the next step is placing the cup with the seed in a warm spot, on a windowsill and waiting for the seed to sprout. This should take around four to eight weeks. In my experience, it took around two months for me to see a root. During this time, I would periodically change out the water in the cup so that the seed was sitting in fresh water. After a while, the seed will crack and little roots will start to emerge from the seed.
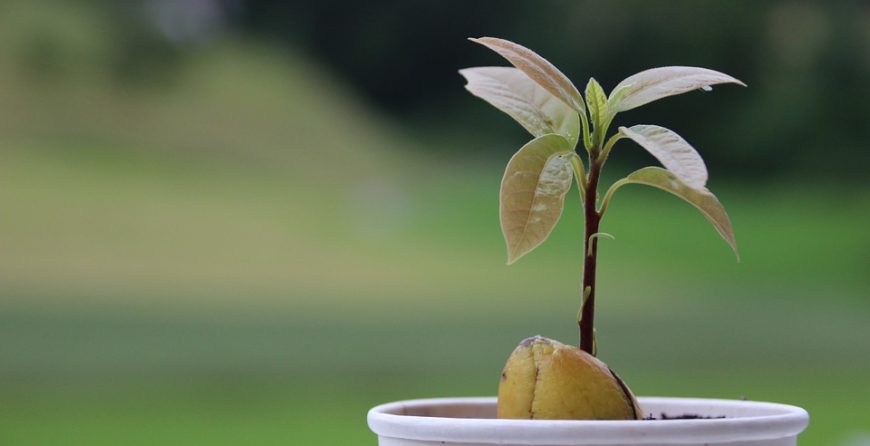
A few days later, after you see the seed’s roots, you will eventually see a little sprout pop out of the top of the seed. This is a great sign! Your little avocado tree is growing and on its way. While your tree sprouts, continue to keep it half submerged in water in the cup, never let it dry out.
The transfer stage:
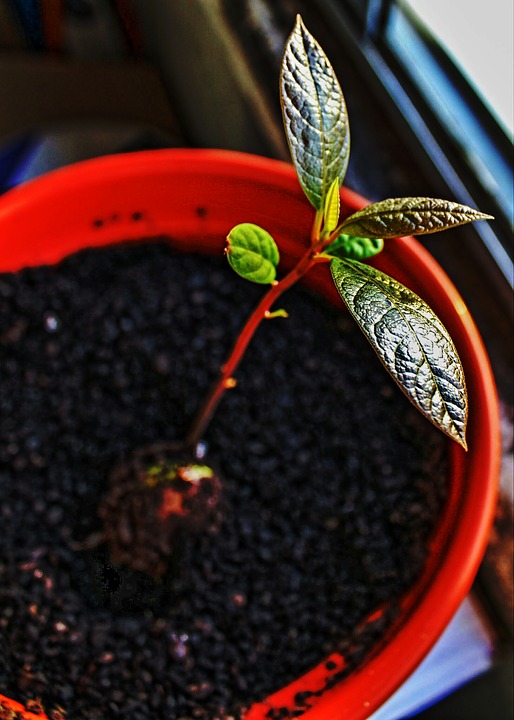
Once your tree is about 15 cm tall, you can cut the stem down to 7.5 cm so that the plant can grow again and be stronger. Then, once the stem has grown back to 15cm, you will need to transfer the plant into a 20-25cm deep pot with soil inside the pot. Do this by making a small hole in the soil that is in the pot and sticking half the seed into the soil. Make sure the top of the seed is still exposed and out of the soil. Then place the pot back on the windowsill in the sun and water the plant.

The final continuous step:
Leave the plant in the sun. This will inspire the planet to grow. Occasionally, snip off a few leaves to encourage the plant to grow thicker.
Finally, water your avocado and make sure the soil is damp every day. The plant will grow bigger every month and eventually it will be tall enough to plant outside in the summer.
So, when does your tree produce fruit? Well, here is the disappointing part about this process, some avocado trees will never produce fruit, while others can take two years or more to produce fruit. That’s why we suggest to grow many seeds into trees so that if one seed doesn’t sprout or your tree doesn’t produce fruit, you still have a few more changes of other trees producing fruit.
For more gardening blogs head over to our blog page or like our facebook page: Aucklandgardeningservices.
For all your Auckland gardening maintenance call us on 0800 514 514.


